By Lily, Master Crochet Designer & Amigurumi Mentor
Whenever I look back at the very first amigurumi bear I ever crocheted, I can’t help but chuckle. I followed the pattern row by row, but I had no idea about stitch tension or how to distribute stuffing. By the time I sewed on the ears, the head was lumpy, one cheek sagged lower than the other, and white fiberfill was peeking through every stitch like stuffing escaping a pillow!
Amigurumi is more than just crocheting small toys; it is three-dimensional sculpture with yarn. Once you learn how to control your hook gauge, master the invisible decrease, and place facial features with mathematical symmetry, a simple ball of cotton magically takes on a soulful, expressive personality.

Whether you want sweet nursery keepsakes, whimsical desk companions, or bestselling inventory for craft fairs, this curated collection of 20 cute amigurumi crochet patterns from Creative Fabrica brings together tested construction, adorable character design, and my personal tips for clean, professional finishes.
The 3 Core Rules for Flawless Amigurumi Sculpting
Crocheting 3D stuffed toys requires a completely different approach than making garments or blankets. Gaps in your fabric will stretch under pressure, causing stuffing to leak out over time.
Apply these three foundational principles before starting your next character:
Lily’s Amigurumi Principles:
- Downsize Your Hook by 1.0mm to 1.5mm: If your yarn band calls for a 3.5mm hook, drop down to a 2.5mm or 2.25mm hook instead. Dense, tight stitches create an impenetrable shell that keeps white polyester fiberfill completely invisible.
- Always Use the Invisible Decrease (Inv-Dec): Standard decreases leave visible bumps and small gaps. Working through the front loops only (FLO) of two stitches creates seamless decreases that look identical to regular single crochets.
- Stuff in Small, Firm Pinches: Never cram a single large handful of polyfill into a head. Tear your stuffing into walnut-sized wisps and pack outward against the crochet walls to sculpt smooth, round cheeks without lumpy surface dimples.
Explore More Handmade Animal Collections:
→ 10 Cute Woodland Amigurumi Patterns: Easy Fox & Bear Toys
→ 7 Cute Sea Creature Amigurumi Patterns: No-Sew Turtles & Whales
20 Cute Amigurumi Patterns to Stitch Next
From sweet domestic kitties to round hippos and heirloom teddy bears, here is the complete showcase of tested digital patterns from Creative Fabrica.
1. Cute Cat Amigurumi Crochet Patterns
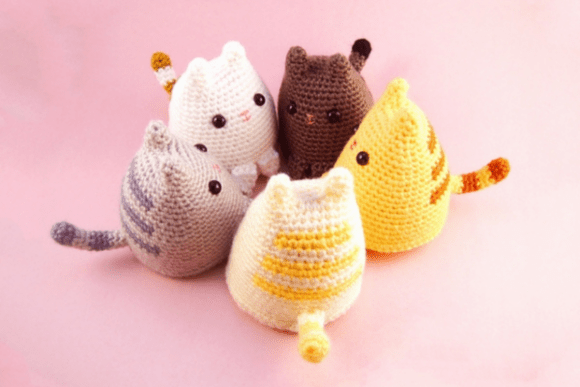
This classic feline amigurumi pattern features balanced proportions, upright sculpted ears, and a gently curved tail that wraps naturally against its flank. The seamless head-to-body transition eliminates clumsy neck seams, making it a reliable project for confident beginners.
The written PDF provides clear stitch counts for every spiral round, ensuring your stitch increments produce a smooth, round body without puckering or angular steps.
Lily’s In-Depth Recommendation:
Yarn Selection: Work in a sport or DK weight 100% mercerized cotton (such as Paintbox Yarns Cotton DK from LoveCrafts). Mercerized cotton gives the coat a silky finish that resists fuzzing over time.
Facial Embroidery: Embroider the nose using horizontal satin stitches with embroidery floss, then pull an anchor strand down into a small inverted ‘Y’ for an endearing expression.
Craft Fair Pricing: Cats are universally adored. Work them in ginger tabby, tuxedo black, or calico; they sell quickly for $24–$30 at local markets.
2. Hippo Cute Crochet Pattern Amigurumi Pdf
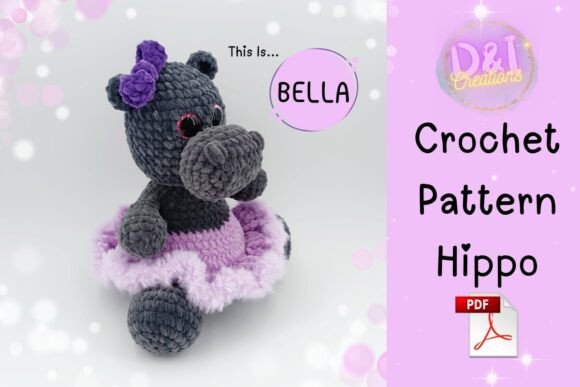
Departing from the usual barnyard lineup, this adorable round hippo features an oversized sculpted snout, tiny cupped ears, and stubby weighted legs that keep it sitting upright on desks and nursery shelves.
The pattern uses gradual oval expansions on the muzzle to create realistic hippo contours without complicated short rows. It’s a wonderful tactile make for nursery decor or children’s gifts.
Lily’s In-Depth Recommendation:
Snout Shaping: Stuff the wide snout firmly before working the neck decreases. Firm packing gives the hippo its signature friendly, chubby silhouette.
Nostril Details: Embroider two vertical back-stitches in charcoal grey yarn on the upper muzzle for realistic nostril indents.
Color Play: Try working this in soft lavender or dusty sky blue rather than plain grey for a whimsical modern nursery palette.
3. CROCHET PATTERN: Cute Duck Amigurumi
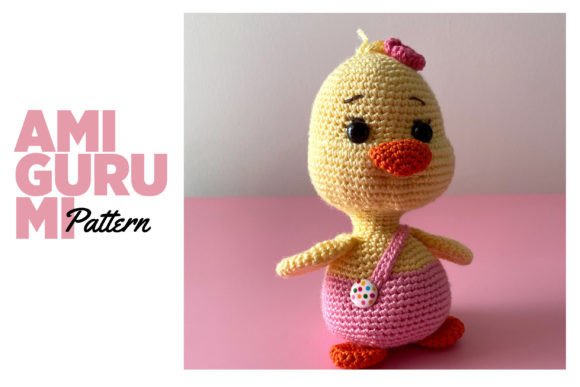
A cheerful little duckling featuring a spherical head, tiny curved wings, and a bright orange bill that works up in under an hour. It is one of the most rewarding confidence-builders for anyone just starting with continuous rounds.
The teardrop body flows naturally from the magic ring with zero complex joining techniques, making it an ideal scrap-busting project for small amounts of yellow cotton.
Lily’s In-Depth Recommendation:
Bill Attachment: Flatten the orange bill piece and sew across both thicknesses directly between rounds 10 and 11 for an authentic duck profile.
Sensory Toy Option: Insert a small 20mm plastic rattle disc inside the body cavity before closing for an adorable baby shower gift.
Safety Note: If gifting to babies under three years old, embroider sleepy eyes with black embroidery floss instead of using plastic safety eyes.
4. CROCHET PATTERN: Standing Duck Amigurumi
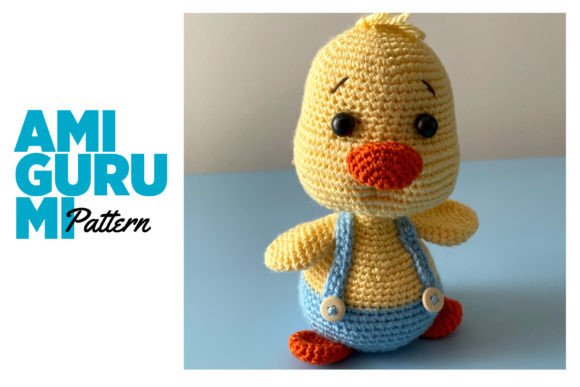
A slightly taller variation on the duck silhouette featuring flat webbed feet that give the bird an upright standing posture. It looks delightful perched along bookshelf edges or grouped in pairs.
The pattern details how to position and seam the webbed feet symmetrically so the finished duck balances comfortably without leaning.
Lily’s In-Depth Recommendation:
Foot Balance Secret: Do not over-stuff the flat feet. Keep them relatively thin and insert a tiny coin-sized circle of plastic craft canvas inside each foot base for stability.
Accessory Pairing: Crochet a tiny 2-row pastel scarf or mini bucket hat to give your duckling seasonal charm.
Yarn Recommendation: 100% cotton yarn holds the webbed foot edges crisp and flat, preventing curling over time.
5. Cute Cat Crochet Amigurumi PDF Pattern
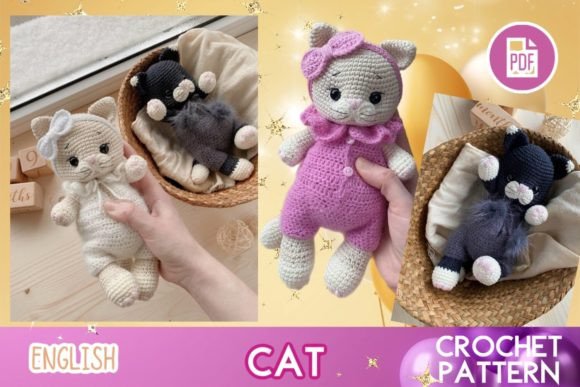
Featuring a rounder, slightly chunkier silhouette with sweet chubby cheeks, this kitten design brings huggable charm to any toy shelf. The cheeks are sculpted through concentrated increase clusters on rounds 12–14.
The written pattern includes detailed step-by-step photos for attaching the front paws and shaping the triangular ears without puckering.
Lily’s In-Depth Recommendation:
Cheek Sculpting: When stuffing, use the eraser end of a pencil to pack stuffing firmly into the lateral cheek bulges before filling the central head.
Transparent Whiskers: Knot 6-pound clear monofilament nylon fishing line through the muzzle for realistic, bouncy whiskers that never go limp.
Color Blocking: Add a white bib and white front paws to create an adorable tuxedo kitten look.
6. AMIGURUMI PATTERN: Easter Bunny
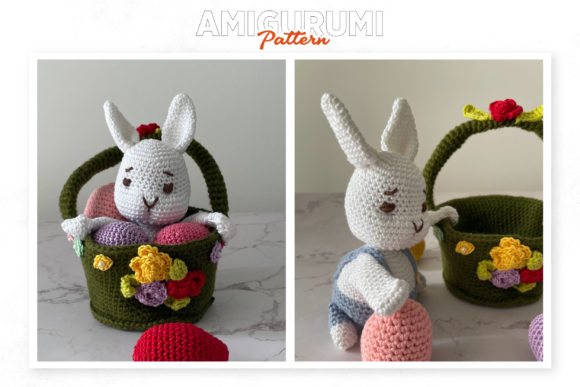
A quintessential Easter bunny with elongated floppy ears, a rounded tummy, and an adorable pom-pom tail. It delivers timeless storybook elegance that looks beautiful in spring baskets and nurseries year-round.
The pattern details how to position and angle the floppy ears so they drape naturally alongside the cheeks with relaxed movement.
Lily’s In-Depth Recommendation:
Floppy Ear Secret: Do not stuff the long ears! Leaving them completely hollow allows the fabric to fold and drape naturally over the shoulders.
Cheek Blush: Lightly apply cosmetic powder blush using a cotton swab to give the bunny soft, rosy cheeks that hold up over time.
Yarn Choice: Unbleached linen-cotton gives the bunny an heirloom Beatrix Potter aesthetic.
7. Rabbit Crochet Pattern Amigurumi Pdf
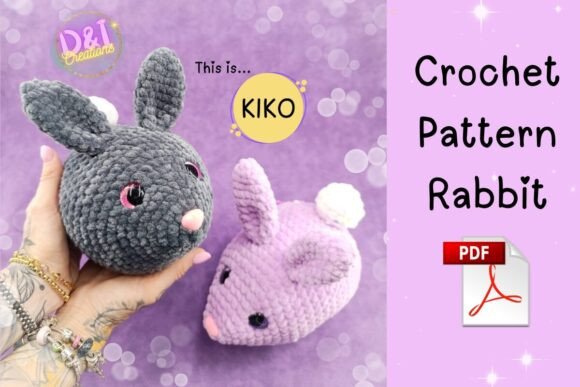
A tidy, well-structured rabbit pattern featuring clearly numbered rounds and consistent decrease pacing, making it a reliable make for batch crafting.
The compact limbs and secure join placements ensure that finished toys withstand enthusiastic toddler hugs and daily playtime adventures.
Lily’s In-Depth Recommendation:
Limb Placement: Use locking stitch markers or long sewing pins to test limb symmetry before stitching. Once pinned, check alignment from both the front and top.
Stitch Tension: Maintain firm, even tension with a 2.5mm hook so the rabbit’s body stays rigid and holds its standing shape.
Boutique Production: A wonderful pattern for makers selling at spring fairs; you can stitch three matching bunnies in a single weekend.
8. Rabbit Bear Cat / Toy Crochet Amigurumi
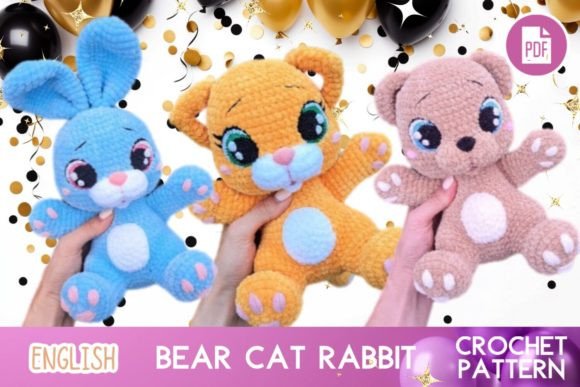
An ingenious 3-in-1 modular design that allows you to crochet a rabbit, teddy bear, or cat from a single foundational body and head template simply by switching ear and tail styles.
Once you memorize the core sphere and torso sequence, you can crochet an entire trio on complete autopilot while relaxing with your favorite shows.
Lily’s In-Depth Recommendation:
Batch Efficiency: Crochet all three base bodies in natural unbleached cotton first, then personalize with brown bear ears, pink cat ears, or long rabbit ears.
Joint Security: Anchor limbs through both sides of the torso with dental floss or nylon thread for jointed movement that never pulls loose.
Value Pack: Bundling all three finished animals together in an organza bag creates an irresistible baby shower trio priced at $65–$80.
9. AMIGURUMI PATTERN: Miniature Easter Bunny
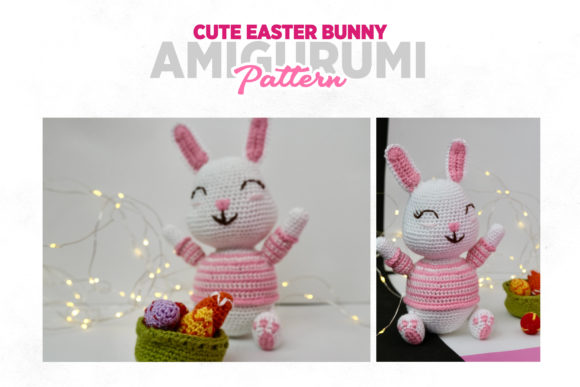
A compact, pocket-sized bunny design specifically scaled for keychains, backpack charms, or hanging holiday ornaments. It finishes in under 35 minutes using minimal yarn.
The miniature dimensions require steady hook control, but the concise instructions keep stitch counting simple and stress-free.
Lily’s In-Depth Recommendation:
Hook Calibration: Use a 1.75mm or 2.0mm hook with crochet thread or fine sport yarn so the tiny limbs stay firm without stuffing leakage.
Hardware Attachment: Sew a small metal split-ring and swivel lobster clasp directly to the crown between the ears for an instant backpack charm.
Gift Topper: Tie onto Easter parcels or gift bags using baker’s twine as an adorable keepsake tag.
10. Rabbit Bunny Crochet PDF / Amigurumi
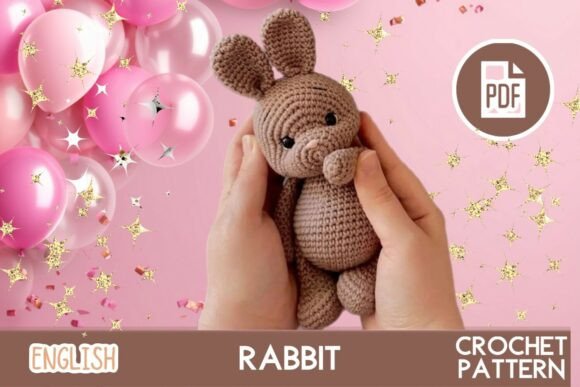
A contemporary designer hare featuring slender legs, a softly tapered muzzle, and modern minimalist styling. It steps away from cartoon shapes into refined Nordic nursery decor.
The streamlined body uses smooth decrease angles that create an elegant silhouette, looking wonderful paired with linen nursery blankets.
Lily’s In-Depth Recommendation:
Color Palette: Work in muted Scandinavian neutrals like biscuit, heather stone, or soft sage cotton for an upscale boutique feel.
Eye Indentation: Pass your needle through the back of the neck into the inner eye corner and pull backwards slightly to create a thoughtful, soulful expression.
Washability: 100% cotton can be machine-washed cold in a delicates laundry bag; reshape flat on clean towels to dry.
11. Crochet Cats / Toy Pattern PDF Amigurumi
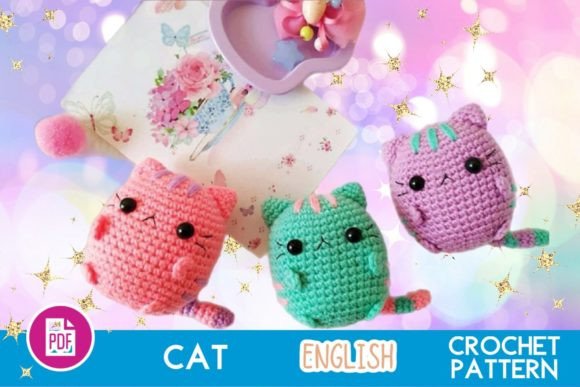
An upright sitting cat pattern with a plush, rounded chest and poseable tail. It is a fantastic canvas for trying out color-block coats, calico patches, or ginger tabby stripes.
The written PDF breaks down front-paw placement and ear shaping clearly, giving your finished kitty a poised, attentive posture that sits steadily on shelves.
Lily’s In-Depth Recommendation:
Seamless Color Changes: When working stripes or tuxedo patches, complete the final yarn-over of the previous stitch with your new color to avoid jagged, stepped edges.
Poseable Tail Hack: Enclose a 12-inch chenille pipe cleaner inside the tail before stuffing to allow it to curl playfully around the cat’s paws.
Base Weight: Add a small bag of poly-pellets to the base of the torso so the cat perches stably without tipping forward.
12. Crochet Cat / Amigurumi Toy / PDF
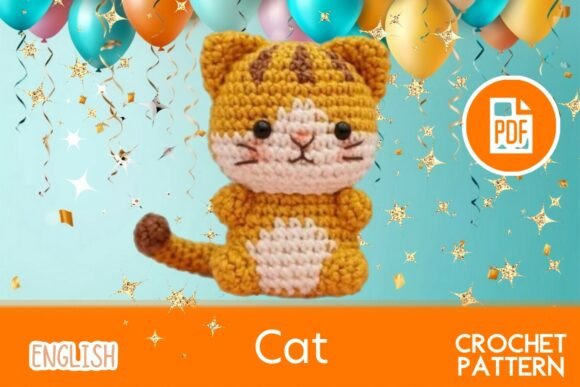
A peaceful sleeping kitten curled up with tucked front paws, a curved tail wrapped against its flank, and embroidered sleepy eyelids. It radiates cozy, serene charm.
The seamless body flows naturally from chest to hips without bulky seams, allowing the cat to rest naturally in the palm of your hand or on a bedside table.
Lily’s In-Depth Recommendation:
Sleeping Eyes: Embroider downward crescents with two strands of dark brown embroidery thread for a calm, resting expression.
Yarn Texture: A soft acrylic-cotton blend gives the sleeping kitten a plush, squishy feel that is comforting to hold.
Desk Companion: Perch next to a computer monitor or on a reading shelf as a calming handmade presence.
13. Cat Kitty Toy Crochet PDF / Amigurumi
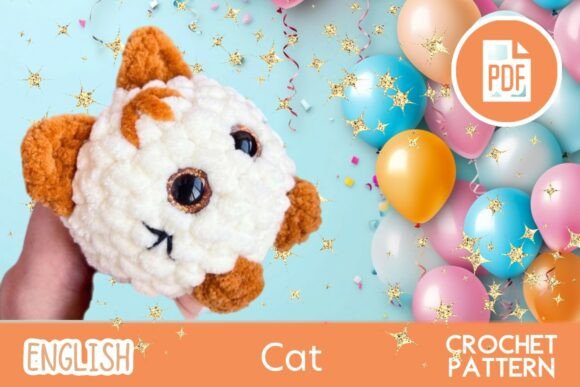
An inquisitive, playful kitten with an elongated body and curious head tilt. The elongated torso makes it ideal for showing off self-striping gradient yarn cakes or color-blocking.
The step-by-step PDF provides clear guidelines for ear positioning and attaching slender limbs that allow the kitten to lounge across desk ledges.
Lily’s In-Depth Recommendation:
Gradient Yarn Play: Try using a self-striping DK yarn cake; the gradual transitions create natural fur variegation without needing to weave in multiple ends.
Collar Accent: Crochet a tiny 2-row collar in contrasting crimson or teal, finished with a miniature jingle bell.
Lounge Posing: Lightly stuff the mid-torso so the cat bends flexibly over computer monitors or shelf dividers.
14. Cat Cup Holder Crochet Pattern Amigurumi
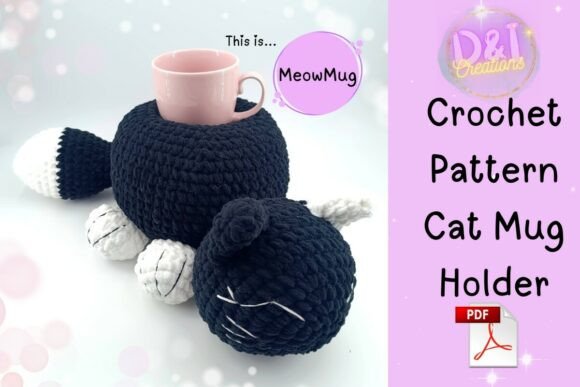
A functional twist on traditional toy amigurumi! This feline-themed cup sleeve features sculpted paws and ears that wrap snugly around ceramic coffee mugs and travel tumblers.
It insulates hands from hot coffee while protecting desks from condensation rings, turning a daily coffee ritual into an adorable moment.
Lily’s In-Depth Recommendation:
Heat-Resistant Fiber: Never use acrylic for hot cup cozies! Boiling coffee will soften synthetic acrylic fibers. Always use 100% worsted cotton from LoveCrafts to insulate heat safely.
Elastic Fit: Work the body in back-loop-only half double crochet for elastic accordion stretch that fits various mug diameters.
Coworker Gift: Pair with a stylish ceramic mug and gourmet coffee beans for an easy, thoughtful handmade gift.
15. Crochet 5 Bears Amigurumi PDF Pattern
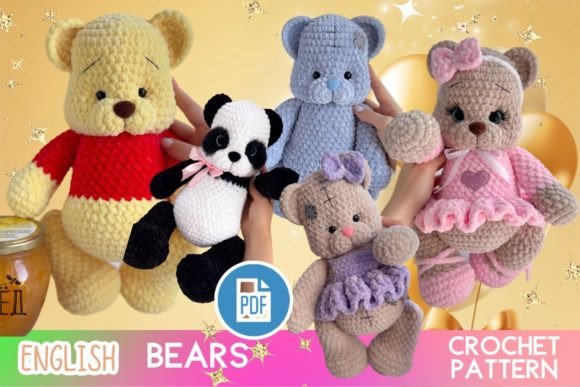
An exceptional multi-pattern bundle featuring five coordinated bear variations in a single PDF download: classic grizzly, panda, polar bear, black bear, and honey teddy.
Having five distinct species built around a cohesive sizing scale allows you to stitch an entire woodland bear family with consistent proportions.
Lily’s In-Depth Recommendation:
Panda Eye Patches: Embroider or crochet the black teardrop panda eye patches and pin them in place before installing safety eyes to ensure perfect alignment.
Yarn Economy: This collection is ideal for using standard worsted yarn skeins in white, black, chocolate, and honey gold.
Nursery Collection: A complete 5-bear nursery set makes a breathtaking centerpiece gift for baby showers.
16. Happy Bear / CROCHET Amigurumi PDF / Toy
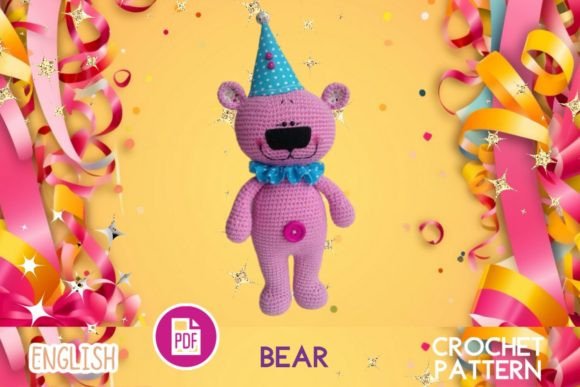
A smiling teddy bear with an upturned embroidered muzzle, rounded ear cups, and cuddly proportions designed to feel warm and inviting straight off the hook.
The written pattern includes dedicated photo tutorials for sculpting the cream muzzle and attaching jointed limbs without leaving visible knots.
Lily’s In-Depth Recommendation:
Muzzle Alignment: Stuff the cream muzzle firmly and pin it between rounds 12 and 16 before sewing with a blind slip stitch.
Mouth Expression: Pull your embroidery needle upwards at both ends of the mouth line to give the bear its signature happy, joyful grin.
Bow Tie Finish: Tie a soft velvet or grosgrain ribbon around the neck for an elegant vintage finish.
17. Teddy Bear Crochet Toy / PDF Amigurumi
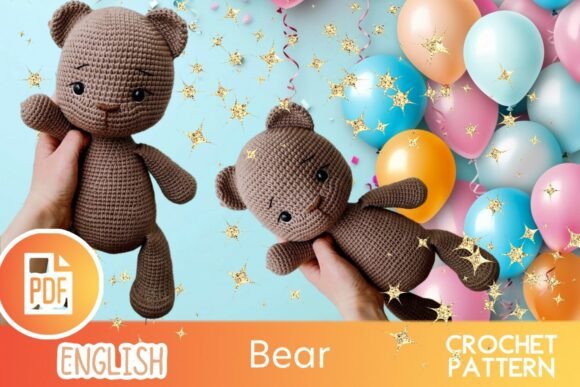
The quintessential storybook teddy bear! Featuring traditional seated proportions, rounded paws, and a classic silhouette, this design embodies timeless handmade comfort.
The pattern offers reliable stitch pacing that makes it accessible to beginners, producing an heirloom-quality keepsake that can be passed down through childhood.
Lily’s In-Depth Recommendation:
Boucle Option: If you want an antique mohair look, crochet this pattern holding a strand of boucle yarn alongside fingering cotton.
Limb Placement: Position the arms slightly angled forward so the bear can sit holding a small flower or wooden heart.
Safety First: For toddlers, embroider all facial details with stranded cotton floss rather than using plastic hardware.
18. Bear Teddy Crochet Pattern Amigurumi Pdf
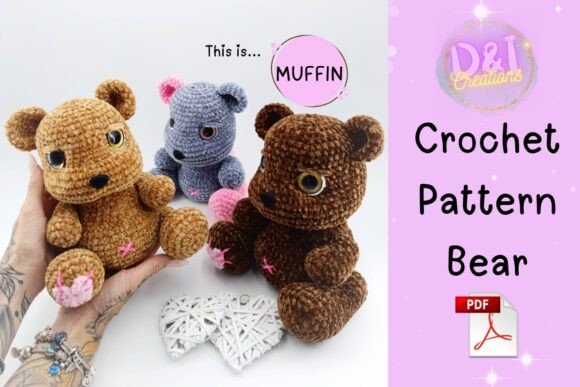
A distinguished, slightly larger teddy bear featuring detailed paw pads, a structured muzzle, and poseable button-jointed limbs.
The button joints allow the arms and legs to rotate 360 degrees, allowing the bear to transition between standing on desks and sitting on beds.
Lily’s In-Depth Recommendation:
Button Jointing: Use strong dental floss or bonded nylon thread through 4-hole wooden buttons to join the limbs securely through the body.
Paw Contrast: Work the paw pads in chocolate brown or cream cotton for authentic teddy bear charm.
Boutique Value: High-end jointed bears sell for $65–$85 in artisan boutique shops.
19. Frog Crochet Pattern PDF / Amigurumi

A cheerful woodland tree frog featuring oversized stalk eyes, long poseable legs, and a wide happy smile that brings instant laughter to any workspace.
The rounded eye sockets are worked separately and joined seamlessly to the top curve of the head, giving the frog an endearing 3D stare.
Lily’s In-Depth Recommendation:
Eye Alignment: Stuff the rounded eye spheres firmly and position them at round 4 on either side of the head before closing.
Poseable Limbs: Insert a 12-inch chenille pipe cleaner through the legs so the frog can sit with knees bent or drape over potted plants.
Color Suggestion: Use bright lime green or moss green cotton with creamy yellow belly patches for authentic amphibian contrast.
20. Amigurumi Animal Bundle
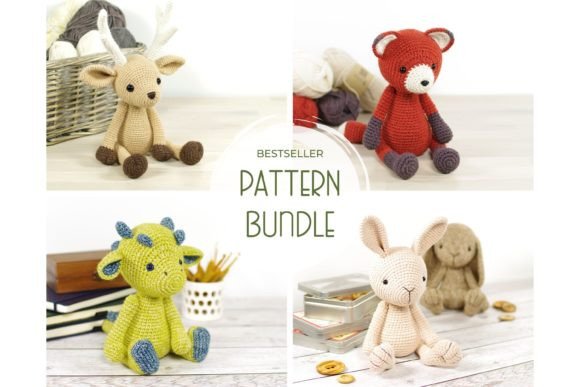
The ultimate value collection for ambitious makers! This extensive pattern bundle covers multiple animal shapes—from wild safari creatures to domestic pets—in one download.
Having a diverse collection of patterns sharing similar scale and techniques lets you build full artisan market displays or gift queues quickly without second-guessing gauge.
Lily’s In-Depth Recommendation:
Pattern Queue: Start with the simpler rounded animals to build muscle memory before advancing into multi-piece jointed characters.
Stash Organization: Keep an assortment of safety eye sizes (6mm, 8mm, and 10mm) on hand to match the various animal heads in the bundle.
Craft Market Strategy: A cohesive animal zoo display draws families instantly to your table; price characters between $20 and $35.
How to Wash and Care for Amigurumi Characters
Because stuffed amigurumi toys are handled frequently by children and collect dust on shelves, gentle care preserves their shape and stuffing integrity:
Lily’s Toy Care Protocol:
- Spot Clean Surface Dirt: Dip a microfiber cloth in mild baby shampoo suds to gently wipe away dust and smudges without soaking the inner stuffing core.
- Machine Wash in a Tied Pillowcase: If deeply soiled, place the toy inside a securely tied pillowcase and wash on cold delicate cycle. Never use fabric softeners.
- Air Dry with Gentle Massaging: Dry flat on clean towels near a sunny window, gently massaging the limbs and snout while drying to redistribute stuffing evenly.
Bring Characters to Life with Every Stitch
There is unmatched joy in watching a simple ball of yarn turn into a little friend with personality and a warm smile that brings genuine happiness to everyone who holds it.
Pick your favorite character, grab your hook, and start stitching comfort and charm today!

Written by Lily
Crochet Designer & Amigurumi Mentor
I teach crafters how to sculpt expressive amigurumi characters and durable handmade accessories. I focus on seamless decreases, tension precision, and child-safe construction so your creations bring joy for decades.
Affiliate Disclosure: This post contains affiliate links to Creative Fabrica, LoveCrafts, and Amazon. If you click through and make a purchase, I may receive a small commission at no extra charge to you. I only recommend premium tools, digital charts, and yarn I trust and use daily.