


By Lily, Crochet Designer & Tension Whisperer
Let me make a very honest confession. When I first started crocheting eight years ago, the magic ring made me cry real tears. I sat on my sofa with tangled balls of acrylic, replaying three-second video clips thirty times in a row. My fingers felt like clumsy sausages, the working loop kept slipping away, and every single circle I tried to close ended up unravelling completely.
Have you ever thrown your hook onto the table in pure exhaustion because you could not even get past row one? You are definitely not alone. The traditional chain-two method leaves a gaping, ugly hole right in the center of your plush toy where stuffing easily leaks out. On the other hand, most diagrams make the adjustable ring look like complicated naval knot tying.
The secret is that you do not need gymnastics in your hands. You just need the right anatomical anchor on your fingers. In this comprehensive magic ring crochet tutorial, I break down the exact hand-wrapping technique that guarantees a tight, gap-free start on your very first try. Once you master this foundational skill, you unlock the ability to make any amigurumi, circular blanket, or winter hat in existence.
Why the Magic Ring Beats the Chain-2 Method Every Time
Many older crochet patterns tell you to “Chain 4, slip stitch to form a ring, and work 6 single crochets into the center.” While this method is sturdy, it leaves a permanent, rigid opening right in the middle. If you are making an amigurumi toy, white polyester fiberfill will inevitably poke through that hole, giving your finished doll an amateur look.
The Magic Ring (also called the Magic Loop or Adjustable Ring) works like a miniature drawstring bag. You work your stitches directly over a moveable loop of yarn. When your first round is complete, you simply pull the tail end, and the center hole closes entirely to zero millimeters. No visible hole, no escaping stuffing, and completely seamless shaping.
Lily’s Foolproof 4-Step Hand Position:
- The Palm drape: Lay the short yarn tail flat across the palm of your non-dominant hand, securing it with your thumb. The working yarn goes toward your skein.
- The X-Cross: Wrap the working yarn up and over your index and middle fingers, forming a neat “X” shape on top of your fingers. Hold the yarn gently with your ring finger.
- The Hook Slide: Slide your crochet hook under the bottom strand of the “X” from right to left, catch the top strand with your hook, and pull it underneath. Rotate your hook slightly upward.
- The Lock Chain: Yarn over with the working yarn and pull through the small loop on your hook. This creates your lock chain. You can now carefully slide the ring off your fingers and begin stitching!
Supplies That Make Learning 10x Easier
Trying to learn the magic ring with dark, fuzzy yarn or chenille blanket yarn is a recipe for frustration. Fuzzy fibers grip against themselves, meaning when you pull the yarn tail to close the circle, the tail will snap right off in your hands.
For practicing your magic loops, smooth DK or worsted weight mercerized cotton from LoveCrafts is ideal. Mercerized cotton glides without friction, allowing you to pull your center ring closed smoothly without snapping or fraying the core strands.
My Must-Have Starter Kit:
- Smooth Cotton Skeins: Paintbox Yarns Cotton Aran from LoveCrafts provides exceptional stitch clarity so you never lose track of your first stitch.
- Locking Stitch Markers: Grab a pack of Locking Plastic Stitch Markers from Amazon. Always clip a marker into your very first single crochet. Otherwise, when you cinch the ring shut, the first stitch will hide inside the circle.
- Blunt Metal Yarn Needles: You must weave the magic ring tail back and forth three times to lock it permanently. A sharp needle will split yarn fibers, but a blunt tip slides safely between stitches.
Ready to Put Your Magic Ring to Work?
Try these beginner-friendly projects that start with an adjustable ring:
Try these beginner-friendly projects that start with an adjustable ring:

8 Adorable Projects That Start With a Magic Ring
Do not just practice rings on empty air—make something delightful! Every single one of these digital patterns starts with an adjustable magic ring and guides you into adorable small makes. Here are eight tested starter patterns curated from Creative Fabrica.
1. Mini Duck Crochet Amigurumi Pattern
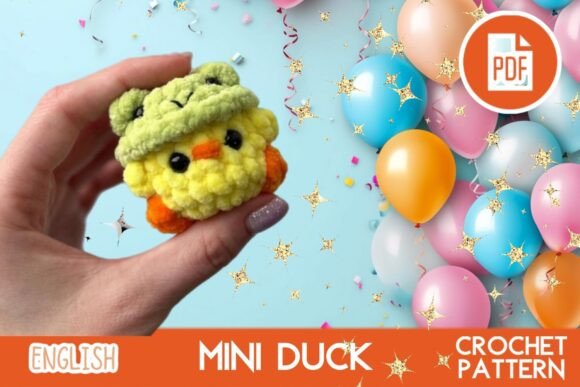
This classic pocket-sized duckling is the ultimate first amigurumi. The head and body are worked as a single piece starting directly with a 6-stitch magic ring. Because it uses only basic single crochet stitches, you can finish it in under forty minutes.
Lily’s Recommendation:
This is the ideal confidence booster for complete beginners. I recommend using a bright sunflower yellow cotton yarn. Keep your magic ring tail at least four inches long so you can weave it through your stitches with a needle once the head is finished; this ensures the beak will not pop loose during play.
This is the ideal confidence booster for complete beginners. I recommend using a bright sunflower yellow cotton yarn. Keep your magic ring tail at least four inches long so you can weave it through your stitches with a needle once the head is finished; this ensures the beak will not pop loose during play.
2. Crochet Cat Plush Toy
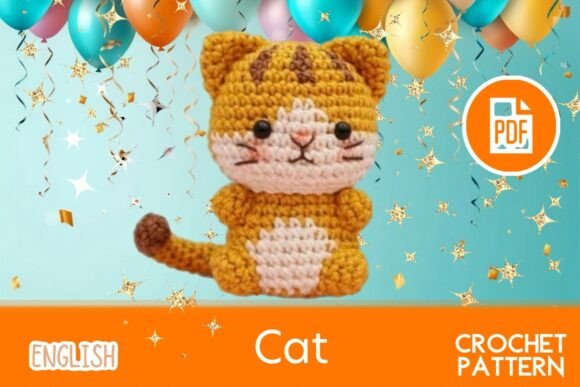
With sweet embroidered closed eyes and a round, huggable shape, this kitten pattern teaches you how to transition smoothly from the magic ring into continuous spiral increases. The PDF includes 44 pages of detailed, macro-photo walkthroughs.
Lily’s Recommendation:
Make sure to insert your safety eyes between rounds 12 and 13 before you cinch the body closed. Working in grey or ginger yarn creates instant personality. If you make this for toddlers, embroider the eyes with dark brown embroidery floss instead of using plastic safety washers.
Make sure to insert your safety eyes between rounds 12 and 13 before you cinch the body closed. Working in grey or ginger yarn creates instant personality. If you make this for toddlers, embroider the eyes with dark brown embroidery floss instead of using plastic safety washers.
3. Crochet Sheep Amigurumi PDF Pattern
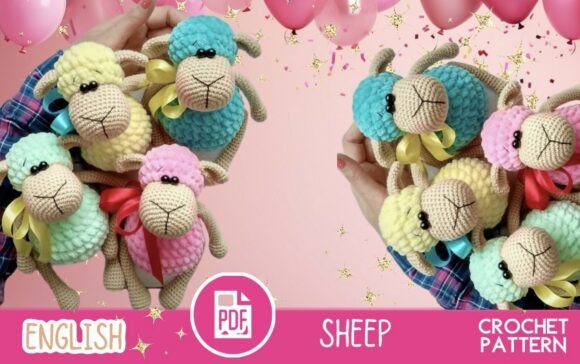
This charming sheep combines a smooth cotton magic-ring muzzle with a textured bobble-stitch fleece body. It is an extraordinary study in how changing stitch textures over an adjustable ring base creates stunning tactile depth.
Lily’s Recommendation:
When doing the magic ring for the head, keep your stitches tight using a 2.75mm hook. A tighter gauge prevents the polyfill stuffing from showing through. Pair this sheep with a pastel nursery blanket for a breathtaking handmade baby gift set.
When doing the magic ring for the head, keep your stitches tight using a 2.75mm hook. A tighter gauge prevents the polyfill stuffing from showing through. Pair this sheep with a pastel nursery blanket for a breathtaking handmade baby gift set.
4. Mini Mushrooms PDF Crochet Pattern
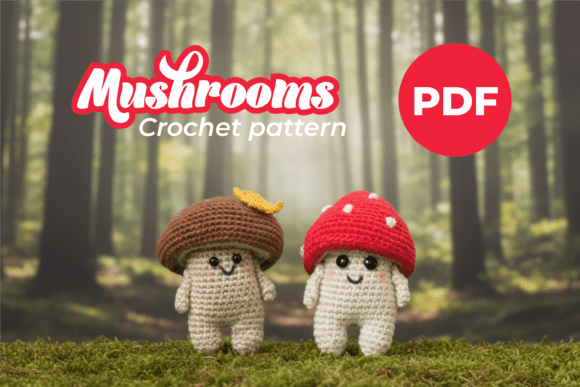
Cottagecore enthusiasts will adore these woodland mushrooms. The caps start with a wide magic circle, rapidly expanding to create a domed umbrella top. They take only fifteen minutes each and make fantastic keychain charms or garland ornaments.
Lily’s Recommendation:
Use red scrap yarn for the caps and embroider French knots with white yarn after the cap is stuffed. Adding a tiny wooden lobster clasp turns these into best-selling craft market items that shoppers grab spontaneously at checkout.
Use red scrap yarn for the caps and embroider French knots with white yarn after the cap is stuffed. Adding a tiny wooden lobster clasp turns these into best-selling craft market items that shoppers grab spontaneously at checkout.
5. Crochet Easter Chicken Toy
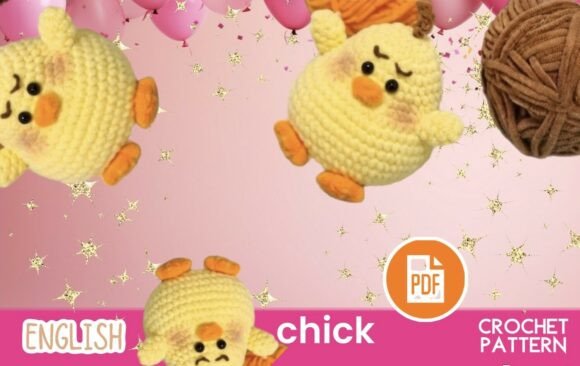
A round, rotund little chick that sits flat on desks or bookshelves. Starting with 8 single crochets in your magic circle, the body quickly builds into a stable egg-shaped orb complete with a tiny comb and miniature wings.
Lily’s Recommendation:
Place a small handful of plastic poly-pellets in a pouch inside the base of the chicken before adding polyester stuffing. This gives the bottom a weighted feel so your chicken stands upright reliably on any table or display shelf.
Place a small handful of plastic poly-pellets in a pouch inside the base of the chicken before adding polyester stuffing. This gives the bottom a weighted feel so your chicken stands upright reliably on any table or display shelf.
6. Rabbit Bear Cat Toy Trio
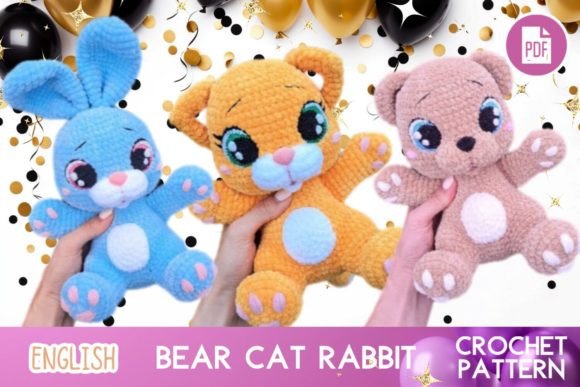
This 3-in-1 pattern uses a single, universal body template that begins with a basic magic ring. By simply swapping the ear attachments (long bunny ears, round teddy bear ears, or pointed cat ears), you create three distinct animal characters.
Lily’s Recommendation:
If you want to master pattern scalability, get this guide. Once you memorize the 6-12-18-24-30 increase formula for the base sphere, you can crochet these animals without even looking at the written instructions while listening to your favorite podcast.
If you want to master pattern scalability, get this guide. Once you memorize the 6-12-18-24-30 increase formula for the base sphere, you can crochet these animals without even looking at the written instructions while listening to your favorite podcast.
7. Amigurumi Hedgehog Toys
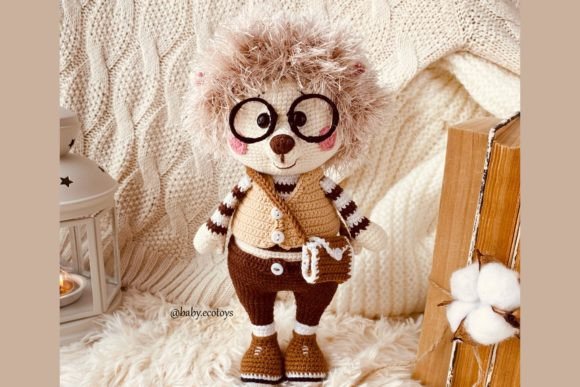
This darling little creature starts with a pointed snout worked from a miniature 4-stitch magic loop. It gradually increases into a rounded body covered in loop-stitch prickles that look wonderfully realistic without being sharp.
Lily’s Recommendation:
Starting a magic ring with only 4 single crochets can feel tight. Use a hook with a sharp, tapered head (like a Clover Amour) to get into those four initial stitches cleanly without splitting the yarn fibers. Work in a warm beige or heathered grey tone for an authentic woodland feel.
Starting a magic ring with only 4 single crochets can feel tight. Use a hook with a sharp, tapered head (like a Clover Amour) to get into those four initial stitches cleanly without splitting the yarn fibers. Work in a warm beige or heathered grey tone for an authentic woodland feel.
8. Baby Dragon Amigurumi PDF
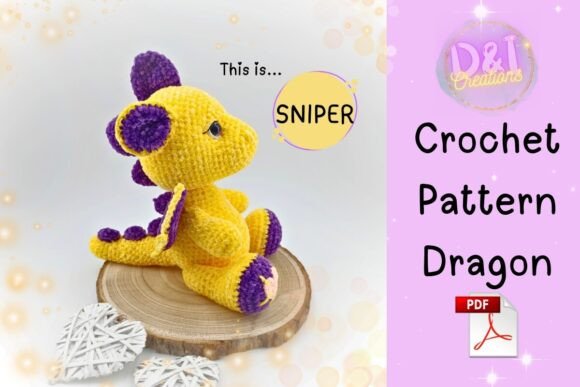
For crafters who want a magical challenge, this baby dragon features curved horns, miniature wings, and a ridged tail. Every single limb and horn begins with an adjustable loop, giving you extensive practice with varied starting diameters.
Lily’s Recommendation:
Make sure you cinch your magic ring extremely tight on the horns. Because horns hold very little stuffing, a loose starting circle will distort their sharp curved shape. Use vibrant jewel-tone yarns like emerald green or deep sapphire blue to make the dragon look truly mythical.
Make sure you cinch your magic ring extremely tight on the horns. Because horns hold very little stuffing, a loose starting circle will distort their sharp curved shape. Use vibrant jewel-tone yarns like emerald green or deep sapphire blue to make the dragon look truly mythical.

3 Deadly Magic Ring Mistakes (And Quick Fixes)
If your magic ring does not work smoothly, one of these three common culprits is almost certainly to blame:
1. Crocheting Over Only One Strand
When you work your single crochets, your hook must go under both the loop and the yarn tail simultaneously. If you only crochet over the loop, the tail cannot act as a drawstring. When you pull the tail, nothing will move! Always ensure both strands sit inside your stitches.
2. Forgetting to Secure the Tail
The magic ring is an adjustable knot; it is not permanent on its own. If you simply cut the tail after cinching, normal handling or washing will cause the ring to loosen, creating a giant hole in your toy. Thread the tail onto a tapestry needle, weave it around the circle once, reverse direction, and weave it back. That friction locks the circle forever.
3. Pulling Too Hard on Chenille Yarn
Chunky plush yarn (like Bernat Blanket or Premier Parfait) consists of tiny fluff fibers woven onto a thin central thread. If you yank the tail violently, the fluff will bunch up into an immovable jam, or the center thread will snap clean in two. Pull gently and ease the stitches along with your thumb and forefinger as the circle shrinks.
Muscle Memory Takes Exactly 10 Tries
Do not expect your fingers to feel graceful on attempt number one. Wrapping yarn around your hand feels strange until your brain maps the movement.
Sit down with a cup of tea, make ten rings in a row, pull them closed, and unravel them. By the tenth try, your hands will do it on complete autopilot. Happy crocheting!

Written by Lily
Crochet Designer & Stitch Coach
I specialize in demystifying intimidating crochet techniques. I believe crafting should be your daily escape from stress, not an exercise in knot-induced frustration.
Affiliate Disclosure: This post contains affiliate links to Amazon, LoveCrafts, and Creative Fabrica. If you click through and make a purchase, I may receive a small commission at no extra charge to you. I only recommend premium tools, digital charts, and yarn I trust and use daily.

