Ready to dive into the wonderful world of crocheted bags? Whether you’re a complete newbie or someone who’s just picked up their first hook, creating your own stylish, functional bags is easier than you might think! This comprehensive guide walks you through everything you need to know about crochet bag patterns for beginners.
Why Start with Crochet Bags? They’re Perfect for Newbies!
Listen, I get it. When you’re just starting out with crochet, the idea of making something as complex as a bag might seem daunting. But here’s the thing – bags are actually fantastic beginner projects! They’re forgiving, practical, and oh-so-rewarding when you finish them.

Unlike delicate doilies or intricate sweaters, bags can handle a few wonky stitches here and there. In fact, those little “imperfections” often add character! Plus, you’ll be using your creation every day, which means constant reminders of your awesome crafting skills. Talk about a confidence booster!
The beauty of starting with simple bag patterns lies in their repetitive nature. You’ll master basic stitches like single crochet and double crochet without even realizing it. Before you know it, you’ll be confidently working your way through more complex patterns.
Essential Supplies: What You’ll Actually Need (No Fancy Stuff Required!)
Don’t let anyone tell you that you need a million different tools to get started. Here’s what you really need for most beginner crochet bag patterns:
Basic Must-Haves:
- Crochet hooks – Start with sizes G/6 (4.0mm) through J/10 (6.0mm)
- Yarn – Medium weight (worsted weight) is your best friend
- Scissors – Sharp ones that can cut cleanly through yarn
- Yarn needle – For weaving in ends and sewing pieces together
- Stitch markers – Trust me, these little guys are lifesavers!
Nice-to-Have Additions:
- Measuring tape
- Row counter (or just use your phone!)
- Small notebook for pattern notes
- Good lighting (seriously, your eyes will thank you)
Now, let’s talk yarn choices. Cotton yarn is fantastic for bags because it’s sturdy, washable, and comes in gorgeous colors. Lion Brand Cotton yarn offers excellent options for beginners. Acrylic blends work great too, especially if you’re on a budget – they’re practically indestructible!
Fundamental Stitches Every Bag-Maker Should Know
Before diving into patterns, let’s make sure you’ve got the basics down pat. Don’t worry – these stitches are way easier than they sound!
The Holy Trinity of Crochet Stitches:
- Chain stitch (ch) – Your foundation for everything
- Single crochet (sc) – Creates tight, sturdy fabric perfect for bag structure
- Double crochet (dc) – Works up faster and creates a slightly looser fabric
Here’s a pro tip: practice these stitches until they become second nature. I’m talking muscle memory, folks! Once you can single crochet while watching Netflix without looking at your hands, you’re ready to tackle any beginner bag pattern.
The slip stitch might seem insignificant, but it’s crucial for joining rounds and finishing edges. Think of it as the period at the end of a sentence – small but essential! Many beginners overlook this stitch, but mastering it early will make your bag construction so much smoother.
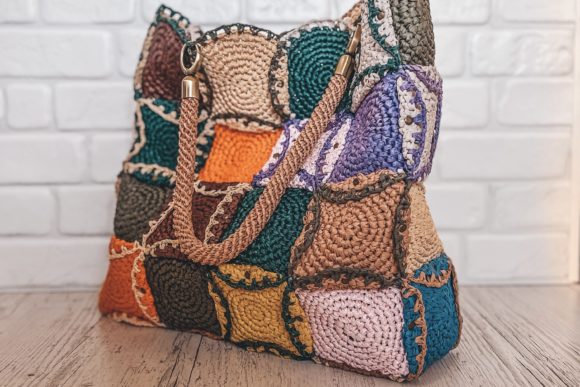
Your First Project: The Classic Granny Square Bag
Ah, the granny square – it’s like the gateway drug of crochet! These colorful squares aren’t just for afghans anymore. They make absolutely stunning bags, and the best part? You can start small and build up your confidence.
For your first granny square bag, I recommend starting with just four large squares. Make two identical squares for the front and back, then create two smaller rectangles for the sides. The pattern is surprisingly simple: chain 4, slip stitch to form a ring, then work rounds of double crochet clusters separated by chain spaces.
What makes granny squares so beginner-friendly is their forgiving nature. Made a mistake in round two? No biggie – it’ll probably blend right in with the design! Plus, you can mix and match colors to create something truly unique. According to Craft Yarn Council, granny square projects help beginners develop color theory skills while mastering basic techniques.
Simple Tote Bag Pattern: Perfect Weekend Project
Ready for something a bit more challenging? Let’s tackle a basic tote bag! This pattern uses single crochet throughout, creating a sturdy fabric that’ll hold all your essentials.
What You’ll Need:
- 400-500 yards of worsted weight yarn
- Size H/8 (5.0mm) hook
- Yarn needle for finishing
Basic Construction Steps:
- Create the base – Start with a foundation chain, then work in rounds to create a rectangular bottom
- Build the sides – Continue working in rounds, creating the bag body
- Add handles – Either crochet them separately or work them directly onto the bag
- Finish strong – Weave in ends and add any decorative touches
The magic of this pattern lies in its simplicity. You’re basically creating a tube with a flat bottom – nothing too fancy, but incredibly functional! Work your stitches loosely enough to maintain flexibility, but tight enough to create structure.
Don’t stress if your first tote looks a bit wonky. Mine definitely did! The important thing is to keep your tension consistent. If your stitches are too tight, your bag will be stiff as a board. Too loose, and it’ll be floppy as a wet noodle. Finding that sweet spot takes practice, so be patient with yourself.
Market Bag Magic: Openwork Patterns That Wow
Once you’ve mastered the basic tote, it’s time to try something with a bit more pizzazz – the market bag! These beauties use openwork patterns that create a stretchy, expandable design perfect for grocery shopping or beach trips.
The mesh pattern might look complicated, but it’s actually just chains and single crochets arranged in a specific way. You’ll work in a honeycomb or diamond pattern that creates natural expansion points. When empty, these bags scrunch up to almost nothing. Load ’em up, and they stretch to accommodate your haul!
Environmental consciousness meets crafting passion with these reusable market bags. According to research from Environmental Protection Agency, the average American uses 365 plastic bags per year. By making your own reusable crochet bags, you’re not just crafting – you’re making a positive environmental impact! How cool is that?
Drawstring Delight: Cinch-Top Bag Basics
Drawstring bags are having a major moment right now, and honestly, I’m here for it! They’re practical, stylish, and surprisingly easy to make once you get the hang of the technique.
The key to a great drawstring bag is creating evelet holes for your cord to pass through. This involves working chain loops at regular intervals – usually every few stitches across a designated row. Sounds tricky? It’s really not! You’re essentially creating intentional holes in your fabric.
For the drawstring itself, you’ve got options. You can crochet a simple chain cord, braid yarn strands together, or even use ribbon or rope for a different look. I’ve seen gorgeous bags with leather cords, colorful ribbon, and even repurposed shoe laces! The beauty of handmade items is that you can customize every single detail.
Pattern variations are endless with drawstring bags. Make a small version for jewelry storage, a medium one for gym gear, or go large for laundry duty. The construction method stays basically the same – you’re just scaling up or down.
Troubleshooting Common Beginner Mistakes
Okay, let’s get real for a minute. Every crocheter – and I mean EVERY crocheter – makes mistakes. It’s part of the learning process! Here are the most common issues beginners face with bag patterns, plus how to fix ’em:
Tension Troubles:
- Too tight: Your hook should glide through stitches easily
- Too loose: Stitches should hold their shape, not flop around
- Inconsistent: Practice, practice, practice – it’ll even out over time
Counting Catastrophes:
Lost track of your stitches? Been there! Use stitch markers at regular intervals, especially at the beginning of rounds. Count your stitches frequently, and don’t be afraid to frog (rip out) work if you’ve gone off track.
Sometimes beginners get so focused on individual stitches that they lose sight of the bigger picture. Step back occasionally and look at your overall progress. Is your bag taking the shape you expected? Are the proportions looking right? Trust your instincts – if something looks off, it probably is.
The perfectionist in you might want to restart every time you spot an error. Resist that urge! Minor mistakes often become invisible once the project is complete. Save the frogging for major issues that affect the bag’s structure or function.
Color Theory and Yarn Selection: Making Your Bags Pop
Here’s where the real fun begins – choosing colors and textures that make your bags absolutely stunning! Color selection can make or break a project, but don’t let that scare you off.
Foolproof Color Combinations:
- Monochromatic – Different shades of the same color
- Analogous – Colors next to each other on the color wheel
- Complementary – Opposite colors (like blue and orange)
- Neutral plus pop – Beige, gray, or white with one bright accent
Texture plays a huge role too. Smooth cotton creates crisp stitch definition, perfect for showcasing complex patterns. Fuzzy yarns like chenille create a soft, cozy feel but can hide stitch details. Metallic threads add glamour but can be tricky to work with.
Consider your bag’s intended use when selecting materials. A beach bag needs to handle sand and sun exposure, so cotton or linen works best. A fancy evening bag might call for silk or metallic threads. Everyday totes benefit from sturdy, washable materials that can handle regular use.
Free Pattern Resources: Where to Find Inspiration
The internet is absolutely bursting with free crochet bag patterns! Here are my go-to sources for beginner-friendly designs:
Top Websites for Free Patterns:
- Ravelry – The ultimate pattern database with filtering options
- AllFreeCrochet – Thousands of free patterns organized by skill level
- Lion Brand Yarn – High-quality patterns using their yarns
- Red Heart – Classic patterns with clear instructions
- Pinterest – Visual inspiration galore (though always verify pattern sources)
When choosing patterns, pay attention to skill level indicators. Look for terms like “beginner,” “easy,” or “basic.” Read through reviews from other makers – they’ll give you the real scoop on pattern clarity and difficulty.
YouTube tutorials can be incredibly helpful for visual learners. New Stitch a Day offers excellent video guides for various bag construction techniques. Watching someone else work through the pattern can clarify confusing written instructions.
Advanced Beginner Techniques: Level Up Your Skills
Ready to push your skills just a bit further? These intermediate techniques will add professional polish to your crochet bag patterns for beginners:
Shaping Techniques:
- Increases and decreases for curved bottoms or tapered shapes
- Short rows for creating dimensional effects
- Post stitches for textural interest and structure
Finishing Touches:
- Blocking – Steam or wet-block finished pieces for professional appearance
- Lining – Add fabric lining for extra durability and style
- Hardware – Incorporate magnetic snaps, zippers, or decorative elements
Don’t feel pressured to master all these techniques immediately. Pick one that interests you and practice it on a small sample before incorporating it into a full project. Building skills gradually leads to better retention and more confidence.
The jump from basic stitches to shaping techniques might seem daunting, but it’s really just logical progression. You’re using the same fundamental skills in slightly different ways. Trust yourself – you’ve got this!
Seasonal Bag Inspirations: Year-Round Creativity
One fantastic aspect of crochet bag making is how you can adapt patterns for different seasons and occasions. Spring calls for pastel market bags perfect for farmer’s market trips. Summer begs for bright beach totes and lightweight mesh bags.
Fall inspiration comes from rich, warm colors – think burgundy, golden yellow, and deep forest green. Winter bags can incorporate metallic threads for holiday sparkle or cozy textures for everyday comfort. The same basic pattern can look completely different depending on your color and texture choices!
Seasonal considerations go beyond just aesthetics. Summer bags might need UV-resistant yarns if they’ll spend lots of time in the sun. Winter accessories benefit from water-resistant materials for snowy conditions. Thinking about practical applications makes your handmade bags even more valuable.
Caring for Your Handmade Creations
You’ve put hours of love into creating these beautiful bags – now let’s make sure they last! Proper care extends the life of your crochet projects significantly.
Basic Care Guidelines:
- Read yarn labels – Care instructions vary by fiber content
- Wash gently – Hand washing is usually safest for handmade items
- Air dry – Heat from dryers can cause shrinkage or distortion
- Store properly – Stuff bags with tissue paper to maintain shape
Cotton bags are generally the easiest to care for – most can handle machine washing on gentle cycles. Wool requires more delicate treatment but offers superior durability when properly maintained. Acrylic blends fall somewhere in between, offering good durability with easy care.
Regular maintenance prevents small issues from becoming big problems. Check for loose ends or weak spots periodically. A few minutes of preventive care can save hours of repair work later!
Building Your Pattern Collection: Organization Tips
As you dive deeper into the world of crochet bag patterns for beginners, you’ll start accumulating quite a collection! Staying organized from the start will save you countless hours of frustration later.
Digital Organization:
- Create folders by project type (totes, market bags, purses, etc.)
- Use consistent naming conventions for easy searching
- Back up your collection to cloud storage
- Consider apps like Ravelry for comprehensive pattern management
Physical Pattern Storage:
- Three-ring binders with clear sheet protectors
- Accordion files sorted by difficulty or style
- Digital tablet for accessing online patterns on-the-go
Don’t forget to keep notes about your experiences with different patterns! Jot down modifications you made, yarn substitutions that worked well, or sizing adjustments. Future you will thank present you for these detailed records.
Frequently Asked Questions
Q: How long does it typically take to complete a beginner crochet bag? A: Most simple tote bags take 6-12 hours of actual crocheting time, spread over several days or weeks depending on your schedule. Market bags work up faster (3-6 hours), while drawstring bags fall somewhere in between. Remember, it’s not a race – enjoy the process!
Q: What’s the best yarn weight for beginner bag projects? A: Worsted weight (medium/size 4) yarn is ideal for beginners. It’s substantial enough to create sturdy bags but not so thick that it’s difficult to work with. Cotton or cotton blends offer great structure and washability for everyday bags.
Q: Can I resize patterns to make larger or smaller bags? A: Absolutely! Most basic bag patterns can be easily adjusted. To make a bag larger, add more foundation chains for width or work more rounds for height. For smaller bags, reduce the starting chain count. Just remember that changing size might affect yarn requirements.
Q: My bag is coming out lopsided. What am I doing wrong? A: Lopsided bags usually result from inconsistent tension or miscounted stitches. Use stitch markers to track your progress, and count stitches regularly. If your tension varies significantly, consider practicing basic stitches until you develop more consistency.
Q: Do I need to line my crochet bags? A: Lining isn’t necessary but can add durability and prevent stretching, especially for bags that’ll carry heavy items. Fabric lining also creates a more polished, professional appearance. Start with unlined bags to master the basic techniques first.
Q: What’s the difference between working in rows versus rounds? A: Rows create flat pieces that you sew together (good for granny square bags), while rounds create tube-shaped pieces (perfect for seamless totes). Both methods have their place – choose based on your pattern and personal preference.
Q: How do I prevent my bag handles from stretching out? A: Use tighter tension when crocheting handles, consider doubling your yarn, or add a core material like rope or cord inside the handle. Some crocheters reinforce handles by working over a foundation chain or adding interfacing.
Wrapping Up Your Crochet Journey
Well, there you have it – everything you need to know to start creating gorgeous, functional bags with your own two hands! The world of crochet bag patterns for beginners offers endless possibilities for creativity and self-expression.
Remember, every expert crocheter started exactly where you are right now. Those perfectly even stitches and flawlessly shaped bags didn’t happen overnight – they’re the result of practice, patience, and plenty of “learning opportunities” (aka mistakes!). Embrace the journey, celebrate small victories, and don’t be afraid to experiment.
Your first bag might not be Pinterest-perfect, and that’s completely okay! It’ll still be uniquely yours, made with love and determination. Plus, you’ll be amazed at how quickly your skills improve with each project. Before you know it, you’ll be confidently tackling patterns that once seemed impossibly complex.
So grab your hook, pick out some gorgeous yarn, and start creating! Your future self – and everyone who compliments your stunning handmade bags – will thank you for taking this first step. Happy crocheting!